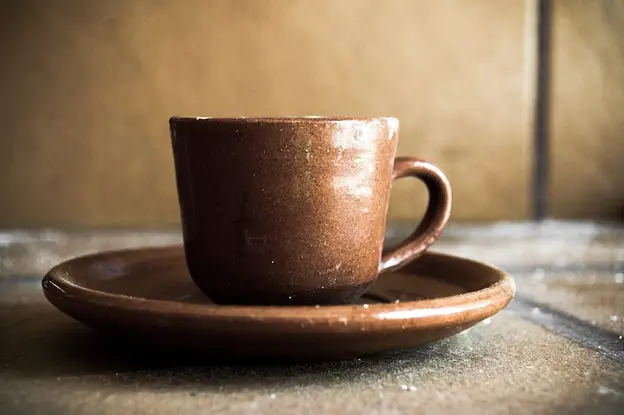
Do you love a big cup of morning coffee right out of bed or maybe before you head off to your office? If so, wouldn’t you love to sip and savor the tasty elixir in a mug that you made yourself? While it might seem that making the perfect mug would require a lot of R&D along with expensive tools like a pottery wheel, that isn’t true. You can create equally beautiful mugs for your coffee breaks with the help of the pinch pottery technique. So, if you don’t wish to spend a lot on pottery tools yet need something that looks beautiful as you sip your coffee out of it, read along to decode the tips that will help you create amazing pinch pot mugs!
Pick The Right Clay For Pinch Pottery Mugs
Given that you will be using this mug for food purposes there are a few clay options you cannot use. Clay variants like air-dry clay or polymer clay cannot be used for food purposes as they aren’t food-safe. The only choices you have are stoneware clay, earthenware clay, and porcelain clay. However, between the three, you need to pick a clay variant that will be easy to work with and doesn’t tire your hands.
While earthenware clay is easy to work with, it has high porosity which might not be ideal for drinking any liquid from. On the other hand, stoneware clay can be a bit tiring to work with as it isn’t as malleable as earthenware or porcelain unless you are using a pottery wheel. So, the best choice for pinch pot mugs is porcelain clay. This clay variant has excellent plasticity and fine particle size that doesn’t hurt your hands.
The fine particles in this clay allow for the addition of intricate details and delicate shaping with the use of your hands. Porcelain can easily be shaped and molded without becoming brittle or cracking even after being fired. Keep in mind that porcelain tends to dry a bit faster as compared to other clay variants. So, make sure you have ample water beside you when working with porcelain clay to keep it wet while working.
Steps To Create The Perfect Pinch Pot Mug
1. Prepare Your Workspace:
To create the best coffee mug out of your clay, you need to ensure that your workspace is clean and free of debris. Any debris present in your workspace can get into the clay and affect its malleability and even hurt your hands when you are hand-building your mug. If possible spread a cloth sheet on your work space. Additionally, make sure you have a container of water and some sponges ready for the task.
2. Prepare Your Clay:
To hand-build your coffee mug, the clay has to be prepared properly to help shape it right without laying a lot of stress on your hands. Start by kneading your clay to remove any air bubbles which will make it highly pliable for pinch pottery. Alternatively, you can wedge the clay by cutting it repeatedly and slamming it onto your work surface which ensures uniform consistency. Now, start by dividing the clay into two portions. The first portion will serve as the body of the mug while the second one will serve as the handle.
3. Create The Body Of The Mug With The Pinching Technique:
Now pick the larger of the two portions and form a ball-like shape. With the help of your fingers, form a depression right at the center of the ball to create a hollow space. Now, start pinching the walls from this hollowed-out center with the help of your thumb as well as fingers. Now, gradually create a cup-like shape while you pinch the clay outwards and smooth it out until the desired result is achieved.
Make sure the walls of the mugs are thick enough so they don’t break or crack while drying or after being fired. Once you are done forming the base shape, you can smooth out the fingerprints with the help of a sponge and some water. Dab the damp sponge on the surface and smooth it out. It is important to maintain even thickness which will contribute to the mug’s structural integrity.
4. Create The Mug Handle:
To create the mug’s handle, you would use the coiling technique as opposed to the pinch pottery technique. Start by rolling your clay into a ball-like shape and roll it out on the workspace in a long, cylindrical form. Attach this handle to your mug by using the scoring technique. If you don’t have a scoring tool with you, simply use anything with a sharp end or even a toothpick that works. However, it is recommended that you opt for a good-quality scoring tool like the Xiem Scoring Tool with retractable tines to achieve good results. Apply some water into the scored area and press the handle onto the mug to ensure there are no gaps. Make sure the handle is thick enough to handle the weight of the mug.
5. Decorate Your Mugs:
You can use any technique to add some beauty to your mugs. If you plan on using glaze for decoration, make sure it is food-safe. Refrain from adding any embellishments that might come off when using the coffee mug. You can also use stamps to decorate the mug’s surface and let it dry for at least 24 to 48 hours depending on the thickness of the mug.
Finally, fire your mug in a kiln that you own, or look for one at your local pottery workshop in case you don’t have one at home. Once the mug has been fired, let it cool properly and it is ready to use.
Conclusion
Handmade pinch-pot coffee mugs add a personal touch to your daily experience. Each mug you create can look different in terms of shape, design, color, or texture. You can take the customization to the next level by carving your name on the mug. However, when decorating your mug, make sure you choose food-safe options. Your mug doesn’t necessarily have to be perfect and you can always create a new one from scratch if you don’t like it. That’s the beauty of pinch pottery! You can create a new one anytime you feel you need a new coffee mug.


