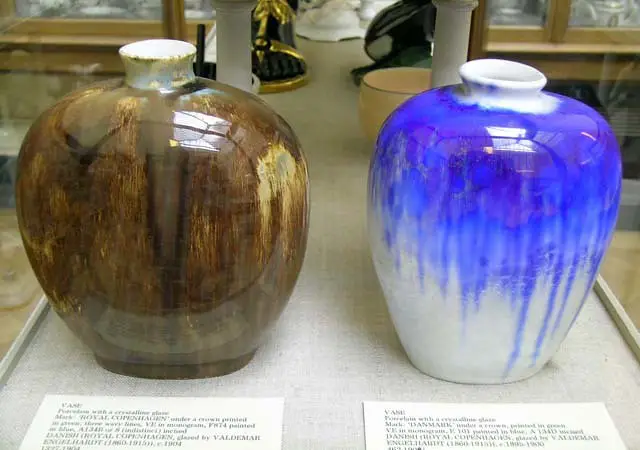
Crystalline glazes are best recognized for their beautiful crystalline formations. Anyone who is captivated by science and art will love this ceramic piece. You need to practice your skills continuously, hone your techniques, and use suitable material if you want to come closer to creating this piece. This article will be your comprehensive guide to mastering crystalline glazes through proven recipes and techniques.
Understanding Crystalline Glazes
First, let us run through the basics of crystalline glazes. These glazes have mechanisms you must understand before trying a hand at them. Here is what you should know:
- How Do Crystalline Glazes Form?
Crystalline glazes thrive under controlled cooling during the kiln firing stage, which brings out their fascinating crystallized appearance. Microscopic crystals form on the molten glaze surface as the glaze faces slow cooling, creating beautiful patterns and textures on the surface of the ceramic, which is a usual phenomenon with crystalline glazes.
- Factors Influencing Crystal Growth
You may wonder why crystals are formed within the glaze or on its surface with this type of glazing. The common reasons are firing temperature, glaze ingredients, cooling techniques, and the oxides that go into the mix, like zinc or titanium. Those who learn these mechanisms can later manipulate the crystal growth to create customized designs.
- Types of Crystals and Their Characteristics
Let us now learn about the various types of crystals in crystalline glazes and their characteristics:
| Crystal Type | Characteristics |
| Zinc Silicate | Needle-like crystals, often transparent |
| Rutile | Golden brown crystals resembling ferns |
| Strontium | Star-shaped crystals varying in color |
| Titanium | Delicate, branching crystals, opaque |
Having Essential Tools and Materials for Crystalline Glazes
Specialized equipment will help you achieve a better finish on crystalline glazes. It includes having a kiln around that can support controlled temperatures accurately. Use high-quality glaze materials like silica, zinc oxide, and fluxes only for good results. The Chuniff 7 Pc Pottery Glaze Tools are efficient equipment to help you achieve a smoother finish on crystalline glazes on your ceramics.
Additionally, to get the right results out of your crystalline glaze firing, find a kiln with the right features to allow controlled firing at all stages. Ideally, go for a kiln extending beyond the temperature of 2300°F (1260°C) along with various temperature control features. It helps you achieve a defined crystallized finish with your glazes.
Proven Recipes for Crystalline Glazes
We can now move to discussing proven recipes that one can employ for their crystalline glazes. Here are two essential recipes and the adjustments you can build upon them upon mastering them:
- Recipes for Different Types of Crystalline Glazes
The two main recipes for crystalline glazes are zinc silicate and rutile. Let us understand their specifications:
Zinc Silicate Glaze
Ingredients: Zinc oxide, silica, fluxes
Firing temperature: 2300°F (1260°C)
Characteristics: Clear base with fine, needle-like crystals
Rutile Crystalline Glaze
Ingredients: Rutile, silica, fluxes
Firing temperature: 2250°F (1232°C)
Characteristics: Warm brown base with intricate fern-like crystals
Variations and Adjustments to Achieve Desired Effects
When you have got your hand fit on the two essential recipes, you can continue to experiment with the crystalline glazes to achieve further refinement. Some aspects that can be experimented with are glaze compositions, firing schedules, and cooling rates. These adjustments will bring about variations in the visual effects on the surface of the pottery.
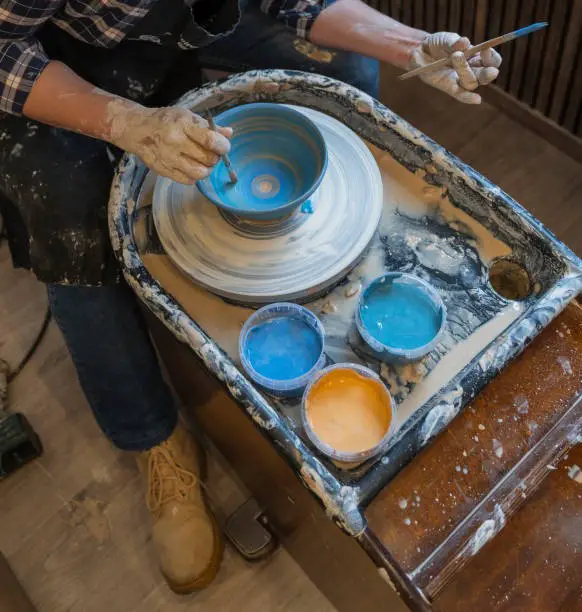
- Techniques for Successful Application
Last, knowing the best recipes for crystalline glazes is not enough. Here is the step-by-step guide to preparing and applying a crystalline glaze:
- Prepare Glaze Ingredients: Decide in advance the measurement of each ingredient and be precise when mixing them.
- Apply Glaze: Use reliable brushing, spraying, and dipping tools to apply the glaze properly.
- Go for the Firing Process: Stick to the recommended firing schedules and move to higher temperatures only after you have mastered the basics.
- Implement the Cooling Cycle: Try controlled cooling to form crystals within the glaze. Do this slowly to avoid thermal shocks.
Conclusion
Mastering, creating, and applying crystalline glazes is undoubtedly a fantastic experience. When you know the fundamentals of crystal formation within glazes, you can better implement basic techniques. In the long run, you can become capable of creating unique recipes and a personalized technique to create crystal finishes.


