One popular way of making hump molds is from styrofoam, and there are a lot of different reasons as to why this is a good idea. But, how do you do it?
It is actually quite simple, and a very effective means to create hump molds to use for your pottery, and here, we’ll discuss how to make hump molds from styrofoam, and why they work so well.
What are hump Molds?
First and foremost, let’s talk about what hump molds are. They are important to understand, and usually, while they’re made of plaster, you can use styrofoam for this.
Some of the different aspects of a hump mold include the following:
- They are convex forms
- The purpose of them is to give a template for slab work
- They are super easy to work with and create great results
- You just push the clay over the mold
- Due to the fact that they absorb water, it allows it to dry out and separate from the mold
- This creates a convex shape
With hump molds, you can do a lot with these, and some of the most popular ways to craft these molds include the following:
- Dinner plates
- platters
- Bowls
- Other shapes that are rounded
Remember that when you do design this tableware, you’ll want to make sure that you do create a mold that looks good, and they are easy to work with.
Why Styrofoam?
You may ask why styrofoam, or even foam board. Well, there is actually a lot that you can do with this, and there are some great benefits to be had with styrofoam.
Potters don’t take into account how styrofoam can help them with designing various pieces. Lots of times, they think styrofoam is flimsy, and not to be used.
But, styrofoam has a lot of amazing benefits to it, and they include the following:
- Usually easy to press into in order to create a good mold
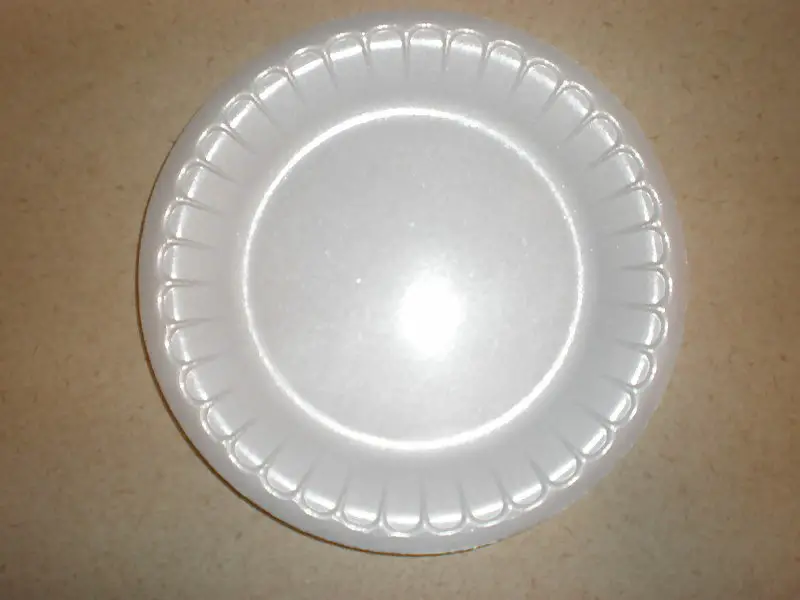
- They are pretty strong since most of the time they need to hold food and other contents
- The flared rims are good and offer a good area for decoration
- The “well” of these tend to be easier for people to work with, and they offer a depth to them
So yes, styrofoam is something that works well, and usually, you can get some decent curve with this. Many times, you can get an angle of up to 45 degrees with styrofoam, which is pretty nice considering how much pressure that can put on the mold, since the material isn’t that strong.
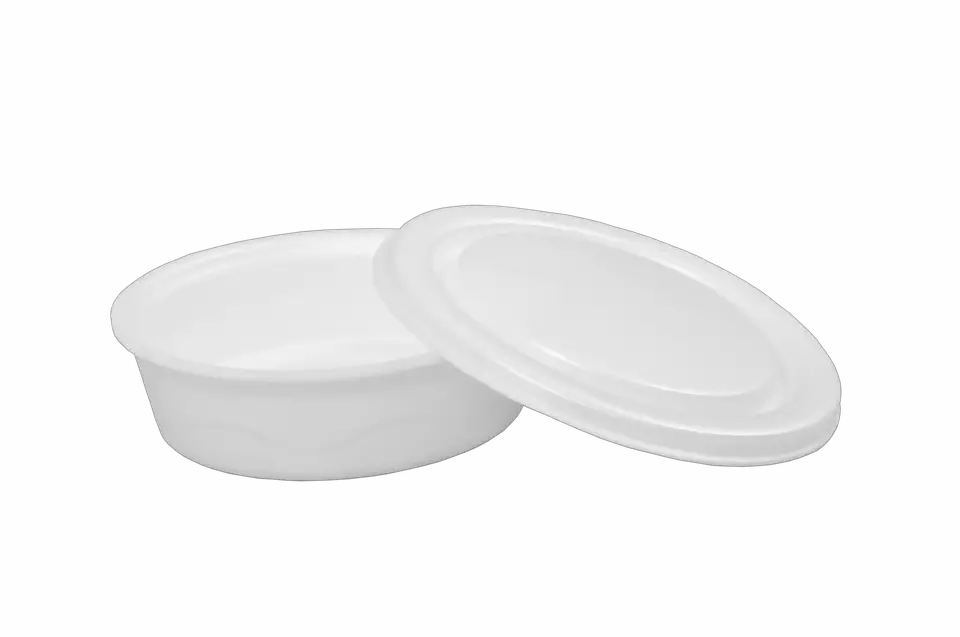
Styrofoam bowl molds are also really good for a person to work with for various reasons, and that’s due to the following:
- They offer a rim that’s smooth and curved
- They offer a deep nature to the bowls, but also a nice rim with no level
- You don’t need to worry about it being too shallow
However, some of the downsides of these styrofoam hump molds are the following:
- If you’re making a bowl, be ready to sand
- They often can shrink a lot more, up to 16% shrinkage
- They often can be awkward when you first work with these
Tips for When You Start to Make a Hump Mold
When you first make a hump mold from styrofoam, there are a few things that you will want to keep in mind, and this especially applies to limitations of this.
They include the following:
- These molds shrink when the clay dries
- You need to have the mold be elastic enough for the contraction of this
- You typically want to at least sandwich something non-porous into this before you begin, because this can prevent issues when you take the clay off
- If you don’t want a textured inside, you should make sure that you take the time and ensure that something is in the middle, or work to smoothe the mold out
When you begin with these molds, you’ll realize that there is a lot that you can do with them, and a lot of potential and the cool thing about styrofoam is that it comes in many different sizes and shapes.
The Material
When you’re getting styrofoam materials, there are a few things that you should make sure that you keep in mind before you begin, and that includes the following:
- Get the kind that doesn’t have any foil or paper coating on the surface
- Never get the white foam board from hobby stores because when you try to scratch it off, it disintegrates super easily
- You can get some styrofoam shapes, just remember that if you are cutting them, it will get everywhere, so if you’re going to use it, always have a newspaper to drape over the mold
- You should use styrofoam to begin in sheets that range from ½ an inch to 2 inches. The ½ inch is really good for platters
- If you are making something way bigger, use the 2-inch types of styrofoam
- You should get adhesive if you’re going to be working with a surface that you’re trying to change, and if you do apply adhesive, make sure it’s at levels a few inches apart
- Get a razor knife in order to make sure that you have the styrofoam in the right size since this prevents it from getting everywhere
- You should also realize that if you do choose to sand it, get ready for it to get everywhere
You should have all of this in hand when you begin before you make your mold. This will, in turn, prevent you from getting too overwhelmed during the process, and in turn, you’ll be able to craft some wonderful templates and molds.
Speaking of templates, let’s move onto those next.
Template Time!
This is your next step in making a styrofoam hump mold. You should make sure that before you begin you have some sort of template or form to use.
Why is that? Well, templates help with the following:
- Helps create the right size of items
- Improves the shape
- Allows for you to be more versatile
When you begin with making a styrofoam plate or bowl, you should begin by taking the bowl or whatever that you’re making it out of, and start by cutting it to dimensions, minus the extra flange rim if you choose to add this.
Now, when you draw a template, there are a few different aspects to consider, and of course, they include the following:
- They should be equal dimensions
- You can draw this with either a ruler, french curve, compass, or anything that you want
- Some people like to have a perfect circle or oval, but then square off the sides at the end which is fine
- You can freehand these as well, trusting your eyes
- Trace it to the thickness that you feel is right
When it comes to drawing the template for your mold, you should learn to trust yourself, and your eyes. You actually can use asymmetry in order to bring about a new feeling to it.
Some worry that asymmetry isn’t right for pottery due to the following:
- It will look “wrong”
- It won’t be as nice on the eyes
- It won’t bring about the energy that you want to
But here is the thing, with templates, you can draw them as you feel like you should, and do what you feel is comfortable for yourself. It can help to bring about a personal touch to it, something that other pieces of pottery may not have.
Drawing the Template to the foam
So you’ve drawn the template, and now you’re using it on the styrofoam. There are a few things that you can use in order, to begin with, it:
- First, if you have the template made of posterboard or manila folder, you can cut this out and then have it all against the styrofoam
- You cut the molds with a saw and foot, or even just a knife to lightly cut it
- Make sure that the blade in order to cut this is able to handle cutting into the styrofoam without creating a mess
Once you have it drawn on, you’ll be able to cut it out, and from here, let’s talk about cutting out the mold and below you can read how to do it:
- Always cut the foam with the blade angled towards the center so that you’re undercutting the shape traced on
- Remember that cutting it will be difficult than cutting air, so it won’t provide much resistance, and it’s very easy to screw up
- Take it slow, because you should get a sense of what it feels like to cut it
- Always make a conscious, delegate effort to make sure that everything stays level
You should always be mindful of cutting the styrofoam because it is so easy to cut through. It is kind of almost like cutting through butter in a sense.
This can bring about a major problem, and that includes the following:
- It can cause the knife to quickly go way off the 45-degree angle you should have
- You could end up creating cuts that you don’t want
- It will end up ruining the mold
Once you finish doing this, you should make sure that you look at the mold itself, and you have to realize that cutting is the first step. You should always take your time, and don’t be afraid to reposition it, and make sure that the blade tries to avoid the bench or table since it will cause scuff marks.
Sanding
The truth is, you are still at the beginning of making a good styrofoam mold. You probably noticed that there is a bit of sharpness to it.
Here is the problem with your model right now: the sharp corners.
If you keep them, it will cause the following issue:
- A jagged edge
- It will make it kind of look like those meat packages
- It may not have the cohesiveness it should
Now if you want to keep that, then fine, but remember that if you do, that’s what it’s going to look like.
You should start to sand it next, and here, we’ll talk about how to do that below:
- Get 36-grit sandpaper
- Hold the mold up to look to see how it looks
- Sand this until you have the curve that you want, and don’t skimp out on this
- Remember that a little bit of roughness will help prevent the clay from sticking to the mold, so only lightly sand it
- For larger molds, you should use a sander or angle grinder to do it, since it may take longer
- Always make sure to vacuum this up once you’re done since this can be quite annoying
Sanding is the next step, and once you’re done with it, you’re pretty much free to use it how you want, and you can from there add the clay slab to your mold.
Using the slab
Now we’re at the fun part, and that’s making the actual slab into the mold. You should use your hump mold at this point in order to create this, but below we’ll discuss the exact steps.
Here, you will need to do the following to take your slab and use it on the mold:
- Take your slab and roll it out to the correct directions
- Cut this out, drape this against the mold, and work the edges in a downward manner so that it conforms to the mold
- You will notice that the curvature of the slab does diminish, so it will be smaller than envisioned
- From here, you can start to trace this around the template, and drape the slab over to that point as well so that it conforms to the mold
- If you’re creating a design of a plate with a flange rim, the piece that’s cut from the second template may cover the mold itself
- If you want plates with a flared rim that is a flange, you create another template and then continue on over this, but usually, that’s much more complicated than you need
- At this point, you can be as free-form as you want to with the template, mold, and the cutting in order to create this
- You should start off with small increments on your templates as well
- If you nee something that is smaller than the one made, trace this, and from there, take off the margins by about ½ an inch and see how that works
This is all that it takes, and while the beginning process may be hard for you to deal with, it can ultimately improve the look of your wares.
Making Templates for Matching Dinnerware
Did you know that you can make matching styrofoam templates for dinnerware? Well, here you’re about to find out how to do it.
- Start by making a small template of a bowl
- Keep making templates increasing in size till you get to the largest one
- Continue this for as much as you need to
- From there, choose the sizes you want to use and then trace them onto the hump molds
- For different bowls and platters, you can also make complex shapes that you may otherwise not be able to easily reproduce
This is a great thing to try, especially if you’re thinking about possibly making it stand out, and if you want to create sets.
A Foot Ring?
Some plates and platters do have a foot ring. The purpose of this is to raise it slightly, create a shadow underneath, and it actually helps with the way it sits.
How do you make these though? Well to do so you’ve got to begin with the following:
- Make the hump mold system that you have
- You can put this on there immediately since you’re putting wet clay to wet clay
- Smooth this down, and from there, have the foot ring at the edge of this and blend in
- You may want to possibly with larger bowls put the curve across the bottom and use a small foot ring to help with lifting
- Dinner plates usually have larger wells and more concentric foot rings for this
- When you add it, if you’ve done slip decoration on this, consider painting the whole underside, so that if the bottom is signed, you can do it in sgraffito
- Once it’s in the leather-hard stage of this, you can shape and level it, cutting notches in order to create impressions of raised feet
For many people, having the right type of mold for your items is always a good way to begin, and a foot ring is always something you can add to your mold as well once you’ve finished the initial shaping.
Extra Cautions
When making a hump mold, there are a few things with styrofoam that you should always try to consider, and they are the following:
- Take time to prepare these, don’t rush into it
- When you cut these out, take it slow
- Do finish off the sides and edges so that it looks uniform
- Do look back, and make sure that it seems in the correct shape
- Try to make sure that you give it a little extra depth to account for the shrinkage
- If you do mess up, don’t be afraid to throw it away since it is styrofoam
- You may mess up the first time, but once you start to get used to doing this, it’s easy to do
When it comes to these types of molds, you will realize that styrofoam is very easy to work with, almost too easy to work with at times, but with the right mindset, and by taking time to effectively shape and prepare the mold, you’ll be able to create from this an amazing shape, and one that you’ll be proud of.
Learning how to Perfect your Molds
Finally, if you feel like you’re struggling with creating molds, thee are always resources that you can utilize in order to learn this.
Some of the different resources include the following:
- Other mentors and teachers
- Online resources
- Various tutorials that you can find offline
- Your pottery studio
When you’re working with these molds, remember that they do take time to learn. Hump molds often are a bit harder than your typical molds due to the fact that they often require you to have to take into account the shrinkage.
That is where most of the problems lay, in the shrinkage of the pottery itself. That is why, when you make this, this should be the first thing that you try to learn and perfect.
With that being said, you should try to practice these types of molds, and see for yourself just what you can get from this. With the right perfection, and the right kind of practice, you’ll be able to create a better result from this, and in turn, a better mindset as well.
Styrofoam is the Way to Go
When you are looking to improve your molds, and also to make them better than ever, styrofoam is often the way to go, due to the fact that it is cheap, easy, and costs way less than your plaster alternatives.
You can get this type from your average hobby store, and the best way to learn how to use this type of mold is to work with it. Try to perfect all of this, and see for yourself what you can make from this since it does take a bit of skill and practice to master.


